If the user has decided that he needs a VPN, connecting it on the ASUS router can be done. Instead of setting up all the devices in the house separately (e.g. computers, smartphones, smart TVs, etc.), it is enough to configure everything once on the router and all connected devices will work through this connection.
Yes, smartphones and laptops that leave VPN when the user leaves home will still need to log in, but with desktop clients the issue will be solved in one step.
It is also possible to create your own VPN server. It can be used, for example, for clients who need to connect to each other remotely, but at the same time it allows you to leave enabled firewalls and individual ports on the router. Additionally, you will not have to worry about data interception at airports, hotels and other places with public Wi-Fi networks.
ASUS VPN client and server
Not all routers support both modes of operation. Some can only connect to VPN services, while others can act as a VPN server themselves (for example ASUS RT-AX82U). It’s just the software that’s pre-installed on certain models. In theory, even on the router, which initially has no such function, you can get it with third-party software. But it’s worth taking into account that all this requires a certain performance which not every router is able to provide. In addition, installing third-party software can affect performance and harm the device itself.
That’s why it’s better to get a router that supports the necessary functionality. In our case the tested ASUS RT-AX82U can work in both modes.
Setting up the VPN-server
The creation of the server tab is the first. Let’s start with it. It provides three options of the protocols: PPTP, OpenVPN and IPSec. All of them are quite easy to set up. By default, of course, they are disabled.

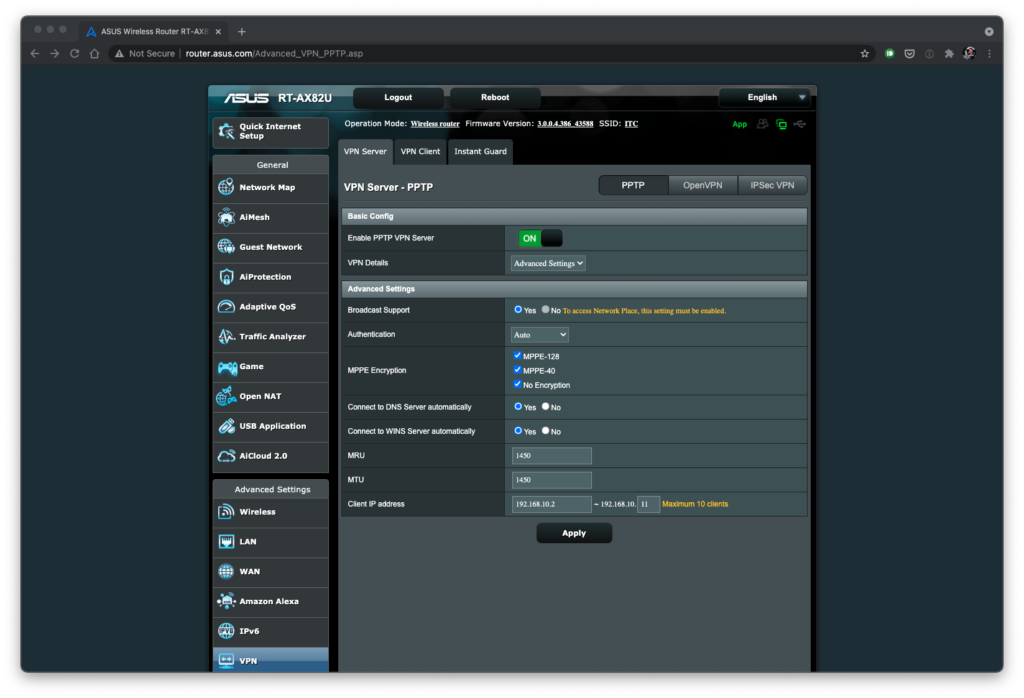
With PPTP connection turned on, a set of basic settings will appear in front of the user. All you have to do is to specify a username and a password, then confirm the action and that’s all, the connection is ready to work. At the same time when entering the data “admin” will prompt how strong the user’s password is.
For more precise settings in the item VPN Details you can choose Advanced Settings, which will give access to all the parameters of the connection.

It’s worth mentioning that connection with a dynamic IP-address owners need to use the DDNS function. ASUS router has such feature and is located in the same-named tab of the WAN section. With its help you can get a permanent domain through which the connection will be performed. Of course, this is true for all VPN protocols.
Enabling OpenVPN is a little bit different from the others. Here you also need to enable the connection, select the port, enter the user name and password. After that you can get the configuration file, which then will be deployed on the client side. Also here appear the options to export or import a certificate, which is useful in the case of replacing the router.
The main tab also selects the type of encryption and Internet access, but if advanced settings are needed, they are also available. In addition to changing the default settings, you can manually add custom configuration.
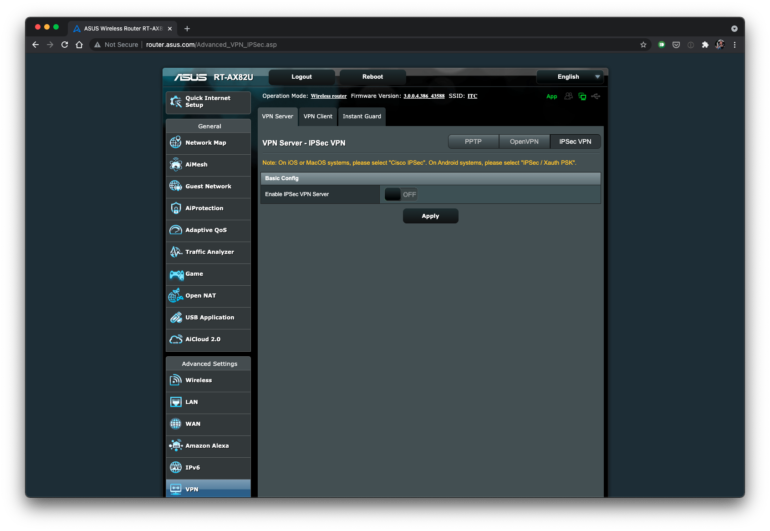
And the third option of connection is IPSec. Such a server is also created in a couple of clicks. Tt is enough to set the key, create a profile for the client and start the server. In the same window you can get or update the certificate.

And on the same principle there is a drop-down menu with transition to additional settings, of which there are not so many.
Connecting to a VPN-client
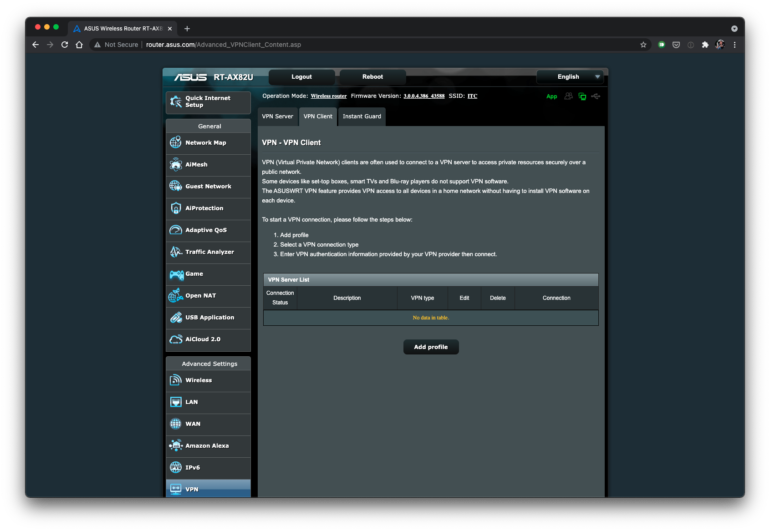
Connecting the router as a client, too, is done using three protocols – PPTP, L2TP and OpenVPN. If it is a question of creating a connection to any VPN service, it is enough to see the necessary settings in your profile on the site of the service provider. Then enter them in the necessary tab of the VPN section in the administrative panel.

Clicking on the add profile button you’ll see a window with three available connection types. PPTP and L2TP are very simple and similar. Here you just need to enter the name (description) of the profile, server address, username and password. In the case of PPTP you can also choose the type of encryption.
In the case of OpenVPN connection, you must first get an .ovpn file, which is also generated in the profile on the site of the service provider. Then you should fill in the fields with profile name, login and password by the same analogy. After that, download the configuration file to the “admin”. Along with this you can add a certificate.
Conclusion
Users who, for some reason, need to work via VPN, will really be comfortable with such features immediately at home router. Creating and using your own server in this case is free and will help protect yourself from unnecessary problems when connecting to public networks in cafes, co-working spaces and other places where there is a chance of data interception. Moreover, it’s pretty easy to figure out how to do it (the manufacturer has left links to all the instructions right in the administrative panel). Connecting to home service providers is also very easy and doesn’t take much time. And setting up the connection between the smartphone and the home server reduces the number of required actions to a minimum. As practice has shown, for ASUS router users all this really doesn’t create much difficulty.

